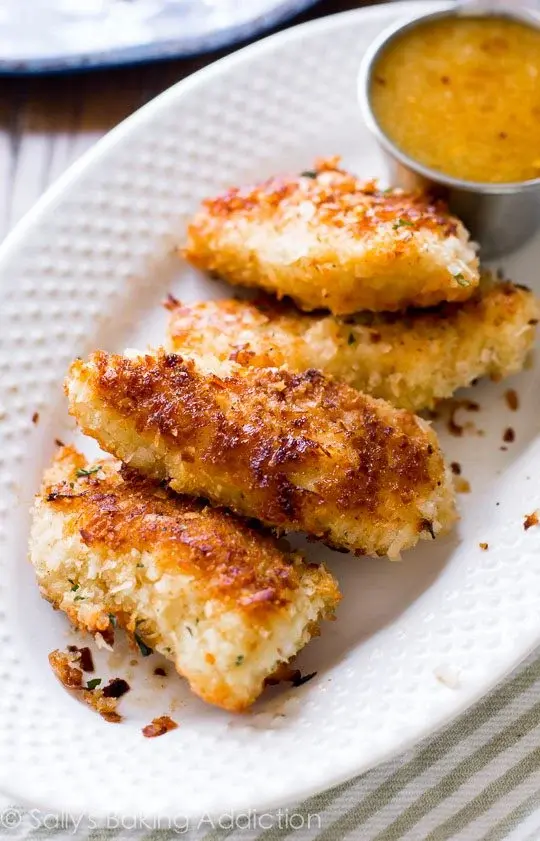
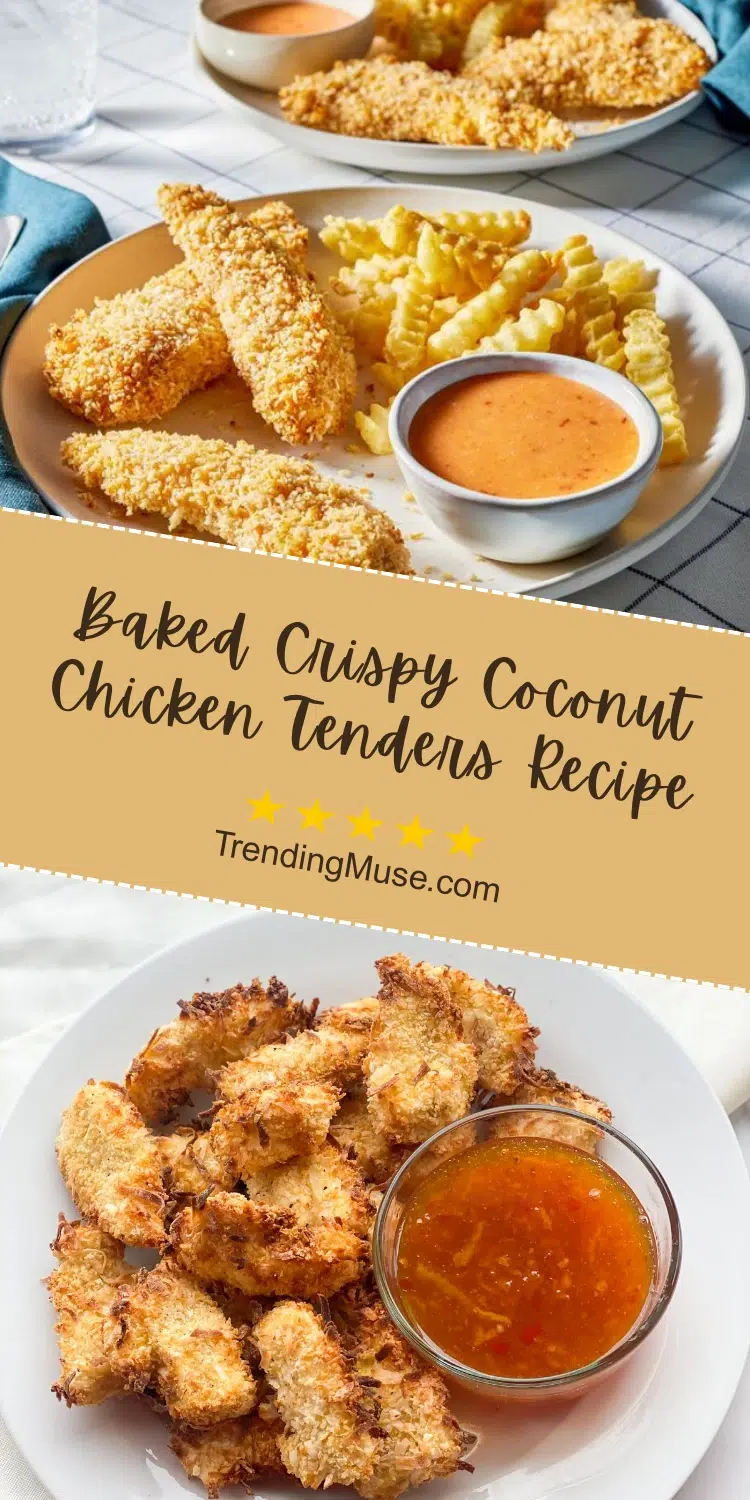
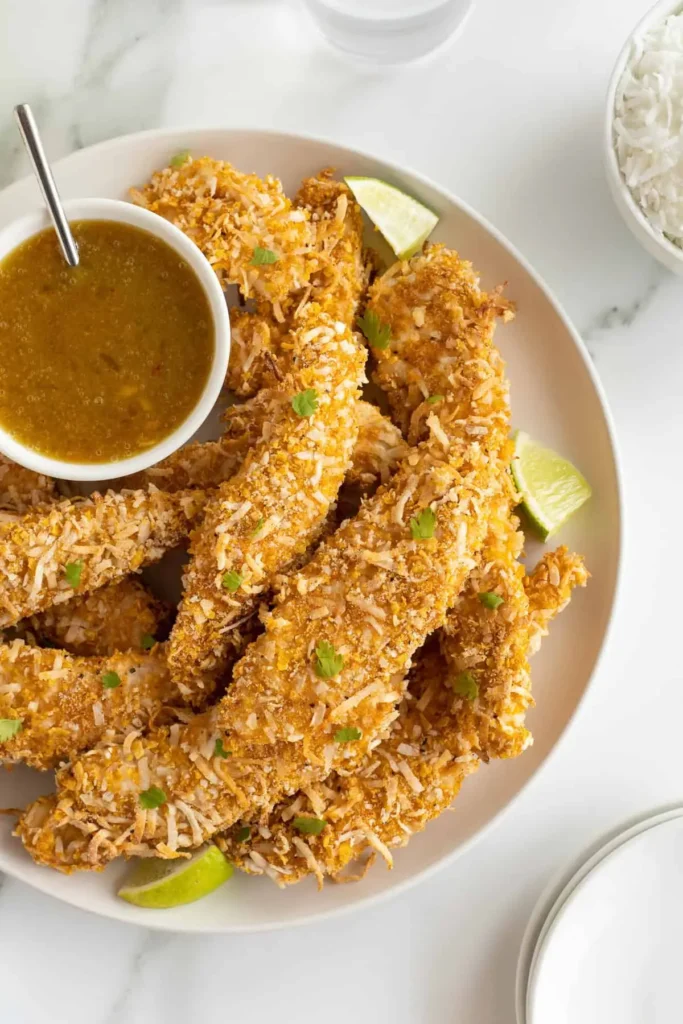
Baked Crispy Coconut Chicken Tenders Recipe
So you’re craving something crispy, crunchy, and packed with flavor, but you’re too lazy to deep fry? I got you. These Baked Crispy Coconut Chicken Tenders are the answer. They’ve got that golden, crunchy exterior you crave, without the guilt of frying. Plus, the coconut gives them a tropical twist that’ll have you feeling like you’re on a beach, even if you’re just in your kitchen. Ready to whip these up? Let’s get to it!
Why This Recipe is Awesome
Okay, let’s talk about how this recipe is a total game-changer. First of all, coconut and chicken are an underrated duo. The coconut adds this perfect, subtly sweet flavor that makes each bite feel like a little taste of paradise. The fact that they’re baked, not fried, means you get all the crisp without the extra grease (or guilt). Oh, and did I mention they’re super easy to make? Seriously, this is the kind of recipe that even your kitchen rookie friend can pull off. It’s idiot-proof, and I didn’t mess it up, so you definitely won’t.
Ingredients You’ll Need
Here’s what you’ll need to make these crispy little bites of heaven:
- 1 pound chicken tenders (about 12-14 tenders, or you can use chicken breasts cut into strips)
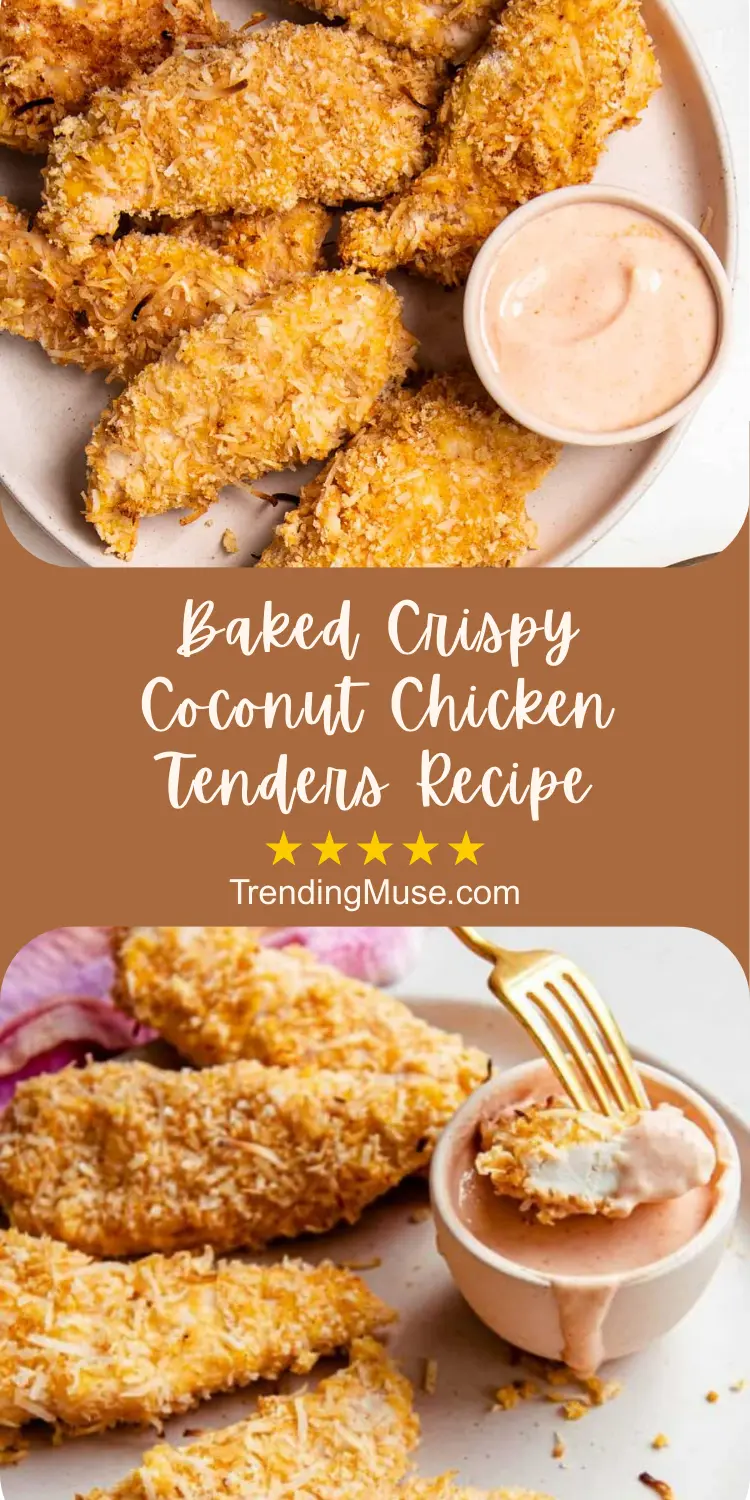
- 1 cup unsweetened shredded coconut (the more coconut, the better)
- 1 cup panko breadcrumbs (for extra crispiness—no soggy tenders here)
- 1/2 cup flour (all-purpose, because you’re not trying to complicate things)
- 2 large eggs (you’ll need these for dipping action)
- 1 tablespoon garlic powder (because garlic makes everything better)
- 1 teaspoon salt (seasoning is key!)
- 1/2 teaspoon black pepper (a little kick never hurt anyone)
- 1/2 teaspoon paprika (for a smoky touch)
- 1 tablespoon olive oil (helps with that golden finish)
Step-by-Step Instructions
- Preheat the oven to 400°F (200°C). You want it nice and hot when those tenders hit the oven, so don’t skip this step!
- Prepare the dredging stations. In one shallow bowl, add the flour, garlic powder, salt, pepper, and paprika. Stir it up so it’s all mixed together. In a second shallow bowl, crack the eggs and beat them lightly. In a third shallow bowl, combine the shredded coconut and panko breadcrumbs.
- Coat the chicken. First, dip each chicken tender into the flour mixture, making sure it’s coated well. Then, dip it into the egg, and finally, dredge it in the coconut and panko mix. Press the coating onto the chicken so it sticks. Lay the tenders on a baking sheet lined with parchment paper or a silicone baking mat.
- Drizzle with olive oil. Lightly drizzle the tenders with olive oil to ensure they get crispy and golden in the oven. No one likes a dry chicken tender.
- Bake. Place the tenders in the preheated oven and bake for 20-25 minutes, flipping halfway through. You want them to be golden brown and crispy on the outside, while still juicy and tender on the inside. If you’ve got a meat thermometer, the chicken should reach 165°F (74°C).
- Serve. Take the tenders out of the oven, let them rest for a minute, and serve with your favorite dipping sauce. These go great with sweet chili sauce, ranch, or even a little honey mustard. Enjoy!
Common Mistakes to Avoid
- Skipping the flipping: Not flipping the tenders halfway through can result in uneven crispiness. The tops might be crispy, but the bottoms will be sad and soggy. Don’t do it!
- Not drying the chicken: If your chicken is too wet, the coating won’t stick properly. Always pat your chicken dry with paper towels before dipping.
- Overcrowding the pan: Give your tenders room to breathe! If they’re too close together, they’ll steam instead of crisp up. Spread them out so each one gets a chance to turn crispy.
- Not checking the internal temperature: Chicken can be tricky—under-cooked chicken is a no-go. Make sure it hits 165°F (74°C) internally so it’s fully cooked and safe to eat.
Alternatives & Substitutions
- Coconut: If you’re not into coconut (but who isn’t?), you can swap it out for crushed cornflakes or ground almonds for a different crunch.
- Chicken tenders: If you can’t find tenders, use chicken breasts or even chicken thighs cut into strips. Just be sure to adjust the cooking time if you’re using thicker cuts.
- Breadcrumbs: Can’t find panko? Use regular breadcrumbs, but panko gives these tenders that extra crispy crunch. It’s worth finding!
- Spices: Feel free to get creative with the spices! Throw in some cayenne pepper for extra heat, or maybe a little curry powder if you’re feeling adventurous.
Other Dinner Dishes:
- Baked Chili Lime Chicken Tenders Recipe
- Baked Chicken Parmesan Casserole Recipe
- Baked Chicken Parmesan and Zucchini Noodles
FAQ (Frequently Asked Questions)
Can I make these in an air fryer?
Yes! Preheat your air fryer to 375°F (190°C) and cook the tenders for about 10-12 minutes, flipping halfway through. You’ll get that same crispy crunch with a lot less oil.
Can I make these gluten-free?
Absolutely! Just swap out the regular breadcrumbs and flour for gluten-free versions. Coconut is naturally gluten-free, so you’re already halfway there.
Can I use sweetened coconut?
Technically, yes, but it will make the tenders a little sweeter. Personally, I prefer unsweetened coconut to keep that savory flavor balance, but if you want a sweeter kick, go for it!
Can I prep these ahead of time?
Yep! You can bread the chicken and store it in the fridge for up to 24 hours before baking. When you’re ready to cook, just pop them in the oven and enjoy.
What should I serve with these?
These chicken tenders go great with a simple salad, roasted vegetables, or even fries if you’re feeling indulgent. They’re also fantastic with a side of sweet potato fries or rice to make it a more substantial meal.
Final Thoughts
And there you have it—Baked Crispy Coconut Chicken Tenders that are crispy, flavor-packed, and totally addictive. Whether you’re serving them as a snack, an appetizer, or a main dish, they’ll have everyone reaching for seconds (or thirds). Plus, they’re way healthier than the deep-fried version, so you can feel good about indulging. Now go ahead, impress someone (or just yourself) with your new culinary skills—you’ve earned it! Happy cooking!