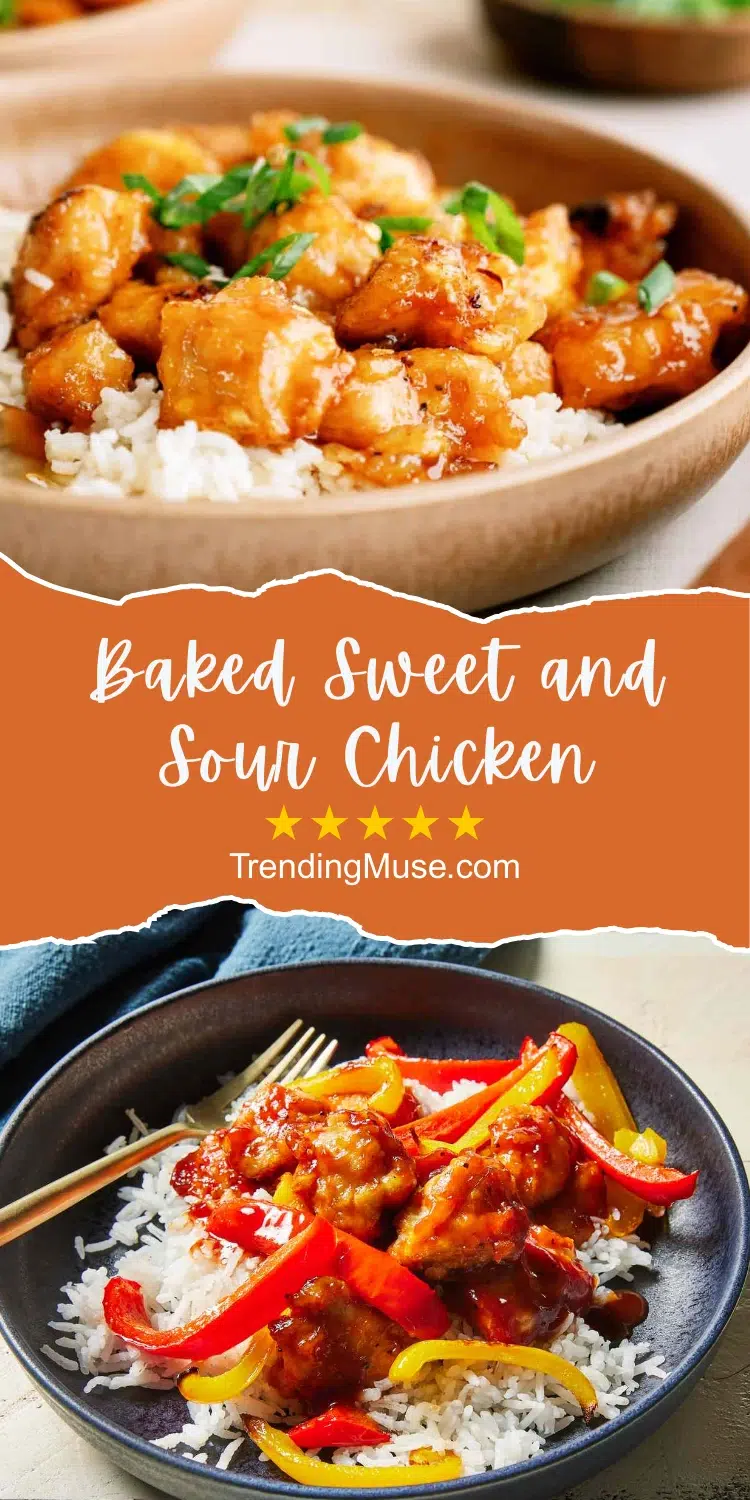
Baked Sweet And Sour Chicken
If sweet and sour chicken is your go-to takeout order, you’re about to feel very proud of yourself. This baked version gives you all that sticky, tangy, sweet goodness without the deep-fryer drama or the “why do I feel like a greasy dumpling?” aftermath. It’s crispy on the outside, juicy on the inside, and coated in a glossy sauce that tastes like your favorite Chinese spot—but fresher. Plus, baking means you can make a big batch without hovering over hot oil like a stressed-out lifeguard. So yeah, tonight you’re basically doing takeout… but smarter.
What Makes This Baked Sweet And Sour Chicken Special
The big flex here is texture + flavor. You still get that golden, crunchy coating thanks to a light breading, but the oven does the work instead of a vat of oil. Then comes the sauce—sweet, tangy, and just the right amount of sticky. It clings to every bite like it’s afraid of being left behind.
Another reason this recipe stands out is balance. The sauce uses simple pantry ingredients, but it hits that classic sweet-and-sour vibe without tasting like straight-up sugar. You can also toss in bell peppers, pineapple, or onions for that takeout-style pop of color and flavor. It’s the kind of dinner that feels fun, comforting, and a little special, even on a random Tuesday.
Ingredients
For the chicken:
- 1.5 lbs boneless, skinless chicken breasts (cut into bite-size chunks)
- 2 large eggs
- 1/2 cup cornstarch
- 1 cup panko breadcrumbs (or regular breadcrumbs)
- 1 teaspoon salt
- 1/2 teaspoon black pepper
- 1 teaspoon garlic powder
- 2 tablespoons neutral oil (or cooking spray)
For the sweet and sour sauce:
- 1/2 cup ketchup
- 1/3 cup rice vinegar (apple cider vinegar works too)
- 1/3 cup brown sugar (or honey)
- 2 tablespoons soy sauce
- 1 tablespoon cornstarch
- 1/2 cup pineapple juice (from a can or carton)
- 1 teaspoon grated ginger (or 1/2 teaspoon ground ginger)
- 2 cloves garlic, minced
Optional add-ins:
- 1 cup bell peppers, chopped
- 1 cup pineapple chunks
- 1/2 onion, sliced
For serving:
- Cooked rice or noodles
- Green onions and sesame seeds (optional, but cute)

Instructions
- Preheat your oven to 425°F (220°C).
Line a baking sheet with parchment paper or foil, then lightly grease it. This helps the chicken crisp up instead of sticking like a clingy ex. - Set up your coating bowls.
Bowl 1: cornstarch mixed with salt, pepper, and garlic powder.
Bowl 2: beaten eggs.
Bowl 3: panko breadcrumbs.
This setup makes coating fast and less messy. - Coat the chicken.
Toss chicken pieces in cornstarch first, then dip into egg, then roll in panko. Press the crumbs on firmly so they stick well. - Bake the chicken.
Spread chicken out in a single layer on the tray. Drizzle with oil or spray lightly. Bake for 15 minutes, flip the pieces, then bake another 8–10 minutes until golden and cooked through. - Make the sauce.
While the chicken bakes, whisk ketchup, vinegar, brown sugar, soy sauce, pineapple juice, cornstarch, ginger, and garlic in a saucepan. Heat over medium, stirring often. - Thicken it up.
Let the sauce simmer for 3–4 minutes until it looks glossy and coats the back of a spoon. If it’s still runny, simmer one more minute—it thickens fast near the end. - Combine and finish.
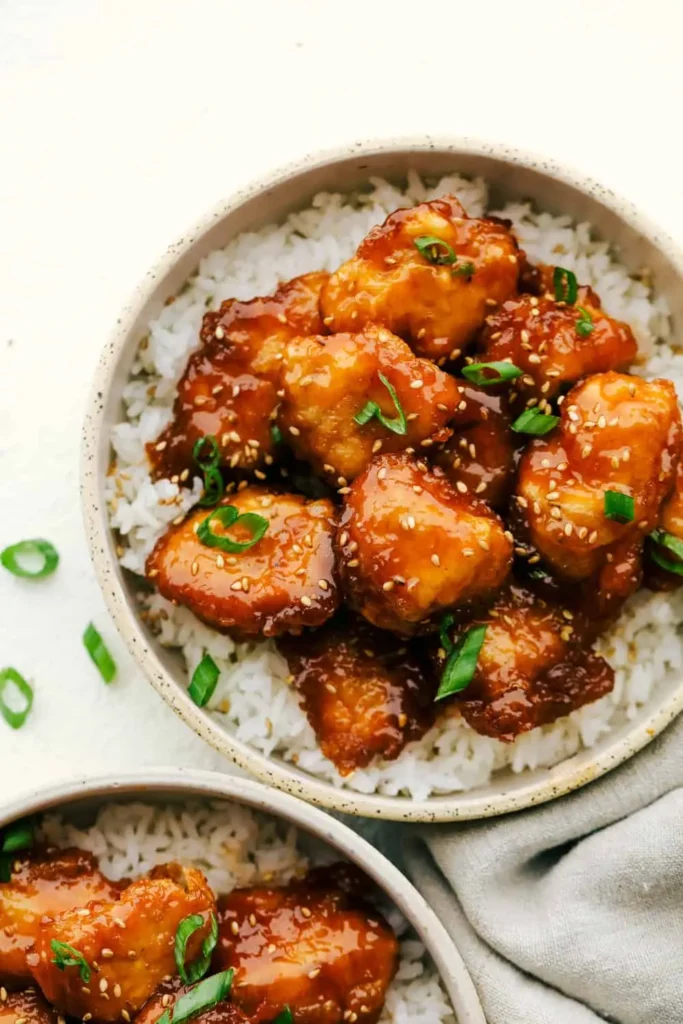
Add baked chicken to a big bowl, pour sauce over, and toss until everything’s shiny and coated. If you’re using peppers or pineapple, mix them in now. - Serve.
Spoon over rice or noodles, sprinkle on green onions or sesame seeds if you feel fancy, and dig in.
Storage Tips
Let leftovers cool before storing so they don’t steam themselves into sogginess. Keep the chicken in an airtight container in the fridge for up to 3–4 days. Reheat in the oven at 375°F for about 8–10 minutes or in an air fryer for a few minutes to revive some crisp.
If you want to freeze it, freeze chicken and sauce separately if possible. The chicken keeps in the freezer for about 2 months. Reheat in the oven, then toss in warmed sauce.
Health Benefits
Since this version is baked, it uses far less oil than traditional sweet and sour chicken. That means less saturated fat while still keeping that craveable crunch. Chicken breast is a great source of lean protein, which helps keep meals filling and supports muscle repair.
The homemade sauce also lets you control sugar and sodium. You can dial things back easily without sacrificing flavor. Add veggies like bell peppers or pineapple, and you’re boosting vitamins and antioxidants while making the plate more colorful and balanced.
Common Mistakes to Avoid
- Crowding the pan.
If chicken pieces touch, they steam instead of crisp. Give them space to breathe. - Skipping the oil spray.
Breadcrumbs need a little fat to brown. A light drizzle makes a huge difference. - Saucing too early.
Don’t bake chicken in the sauce unless you want mushy coating. Toss it at the end. - Overcooking the chicken.
Bite-size pieces cook fast. Check around 23 minutes total so they stay juicy. - Not whisking sauce well.
Cornstarch clumps if you don’t whisk it smooth at the start. Stir like you mean it.
Alternatives and Variations
- Use chicken thighs for extra juiciness and a richer flavor. They’re harder to dry out.
- Make it spicier by adding chili flakes or a squirt of sriracha to the sauce. Sweet + heat is always a good idea.
- Go gluten-free with gluten-free panko and tamari instead of soy sauce.
- Swap the sweetener with honey, maple syrup, or coconut sugar for a slightly different vibe.
- Add more veggies like snap peas, broccoli, or carrots for a full takeout-style skillet.
- Try it with tofu or cauliflower if you want a plant-based twist. Same coating, same sauce, still delicious.
Other Dinner Dishes:
Frequently Asked Questions
Can I make this ahead of time?
Yes! Bake the chicken and store sauce separately. Reheat chicken first, then toss with warm sauce right before serving.
Will it stay crispy after I add the sauce?
It stays crisp for a bit, but like all sweet-and-sour chicken, it’s best fresh. If you’re picky about crunch, dip pieces into sauce as you eat.
Can I use bottled pineapple juice?
Absolutely. Canned or carton juice works great and saves time.
What if I don’t have rice vinegar?
Apple cider vinegar or white vinegar work fine. Rice vinegar is milder, but the swap won’t ruin anything.
How do I know the chicken is done?
Look for golden coating and no pink inside. A thermometer should read 165°F (74°C) in the thickest piece.
Can I add vegetables while baking?
You can roast peppers and pineapple on a separate tray, then mix them in after. If you bake them with the chicken, they’ll steam the coating.
Final Thoughts
Baked Sweet And Sour Chicken is the kind of recipe that makes home cooking feel like a treat instead of a chore. You get that classic takeout flavor, a crunchy bite, and a sauce that’s sticky in all the right ways—without pulling out a deep fryer.
It’s easy, flexible, and perfect for weeknights when you want something fun on the table fast. Try it once, and you’ll probably start wondering why you ever paid delivery fees for this. Now go enjoy your homemade takeout moment—you earned it.