
Lemon Pepper Chicken Tenders
So you’re craving something tasty but too lazy to spend forever in the kitchen, huh? Same. Sometimes you want big flavor without turning your kitchen into a disaster zone that looks like a cooking show gone wrong.
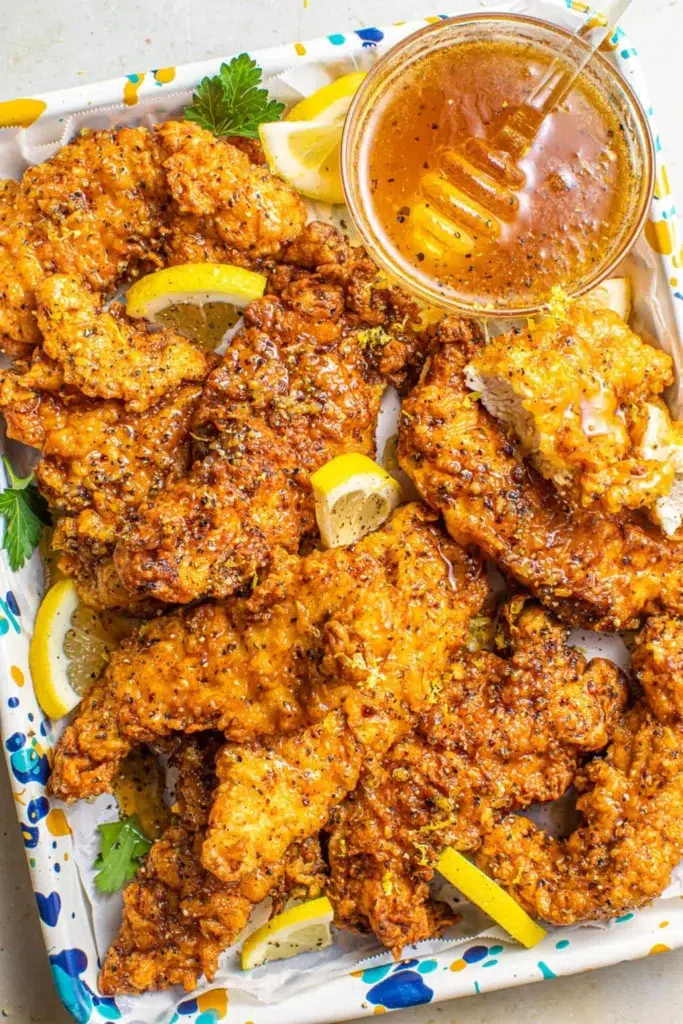
Enter: Lemon Pepper Chicken Tenders. Crispy on the outside, juicy on the inside, and bursting with that bright, zesty kick that makes you feel like you actually know what you’re doing in the kitchen.
Why This Recipe Is Awesome
Let’s start with the obvious: these tenders are dangerously snackable. You make them “for dinner” and somehow half disappear before they hit the table. Weird how that happens.
They’re also ridiculously easy. No fancy techniques. No mysterious ingredients. If you can dip chicken into flour without dropping it on the floor, you can make this. It’s basically foolproof. Even on a Monday.
Here’s why you’ll love them:
- They cook fast. Weeknight hero vibes.
- That lemon-pepper combo? Bright, bold, and a little sassy.
- They work as dinner, lunch, party food, or “I deserve something good” food.
- You can bake, pan-fry, or air fry them. Choose your adventure.
Plus, they feel slightly fancy. Like, “Oh this? Just something I whipped up.” Casual chef energy activated.
Ingredients You’ll Need
Keep it simple. We’re not running a Michelin-star restaurant here.
- 1 lb chicken tenders – The star of the show. No chicken, no party.
- 1 tablespoon lemon zest – Fresh only. Bottled lemon juice is not invited.
- 1–2 teaspoons freshly cracked black pepper – The louder, the better.
- 1 teaspoon garlic powder – Because plain chicken is boring.
- 1 teaspoon salt – Flavor insurance.
- 1 cup all-purpose flour – First stop in the crispy train.
- 2 large eggs – The glue that makes everything stick.
- 1 cup breadcrumbs (panko if you want extra crunch) – Crunch factor unlocked.
- 2 tablespoons olive oil (if baking) or enough oil for frying
Optional but highly recommended:
- A squeeze of fresh lemon juice before serving
- Fresh parsley for that “I tried” garnish
- A dipping sauce (ranch, honey mustard, or spicy mayo—choose your mood)
Step-by-Step Instructions
- Preheat and prep.
Preheat your oven to 400°F if baking. Line a baking sheet with parchment paper and lightly brush it with olive oil. If frying, heat oil in a pan over medium heat. - Season like you mean it.
Pat the chicken dry. Sprinkle it with salt, garlic powder, lemon zest, and cracked black pepper. Don’t be shy—this is where the flavor lives. - Set up your breading station.
Grab three bowls. One for flour, one for beaten eggs, and one for breadcrumbs. Yes, it looks messy. Yes, it’s worth it. - Coat the chicken.
Dip each tender into flour first. Then into the egg. Finally, press it into the breadcrumbs until fully coated. Press gently so the coating actually sticks instead of sliding off like it’s trying to escape. - Cook to crispy perfection.
For baking: Arrange tenders on the sheet and bake 18–22 minutes, flipping halfway.
For frying: Cook 3–4 minutes per side until golden brown and cooked through.
Internal temp should hit 165°F. No guessing games. - Finish strong.
Squeeze fresh lemon juice over the hot tenders. Sprinkle parsley if you’re feeling extra. Serve immediately and pretend you’re not about to eat three before anyone else gets one.
Common Mistakes to Avoid
Let’s prevent kitchen regret, shall we?
Not drying the chicken.
Wet chicken = soggy coating. Pat it dry. Seriously.
Skipping the flour step.
Think you can jump straight to egg and breadcrumbs? Rookie move. The flour helps everything stick.
Overcrowding the pan.
Give those tenders some space. They need room to crisp, not steam in a sad little pile.
Under-seasoning.
Lemon pepper should pop. If it tastes bland, you probably held back. Don’t hold back.
Forgetting to preheat.
Cold oven = uneven cooking. We’re not microwaving leftovers here.
Alternatives & Substitutions
Because life happens.
No chicken tenders?
Use chicken breasts sliced into strips. Easy fix.
Gluten-free?
Swap flour for gluten-free flour and use gluten-free breadcrumbs. Problem solved.
Want extra crunch?
Use panko. IMO, it’s superior when you want that aggressive crunch.
No fresh lemon?
Okay… you can use bottled juice in a pinch. But the zest is where the magic is. If you skip zest, you’re missing the party.
Want it spicy?
Add a pinch of cayenne or red pepper flakes. Lemon + heat = elite combo.
Air fryer fan?
Cook at 380°F for 10–12 minutes, flipping halfway. Spray lightly with oil for maximum crispiness.
FAQ (Frequently Asked Questions)
Can I make these ahead of time?
Yes, but they’re best fresh. Reheat in the oven or air fryer to bring the crisp back. Microwave? Only if you enjoy sadness.
Can I freeze them?
Absolutely. Freeze after cooking, then reheat at 375°F until hot and crispy again. They make future-you very happy.
Can I marinate the chicken first?
You can, but keep it simple. Too much liquid messes with the breading. A quick lemon-garlic marinade works great.
Can I make them without breading?
Sure. Season heavily and pan-sear them. They won’t be crispy-coated, but they’ll still taste awesome.
Why is my coating falling off?
Did you skip flour? Or not press the breadcrumbs in? That’s usually the culprit.
Can I use margarine instead of olive oil?
Technically yes… but why hurt your soul like that? Use oil. Keep the flavor clean and bright.
What dipping sauce works best?
Ranch is classic. Honey mustard brings sweetness. Spicy mayo adds attitude. There’s no wrong answer here.
Final Thoughts
These Lemon Pepper Chicken Tenders are simple, bold, and low-drama—just how weeknight cooking should be. They hit that perfect balance between crispy comfort food and fresh, zesty flavor. Not too heavy. Not too fussy. Just right.
Whether you’re feeding your family, impressing friends, or just treating yourself because you survived the day, this recipe delivers. And once you nail it the first time, you’ll realize how easy it really is.

Now go make a batch. Eat a couple straight off the tray (quality control, obviously). Then serve the rest like the kitchen legend you are. You’ve earned it.


